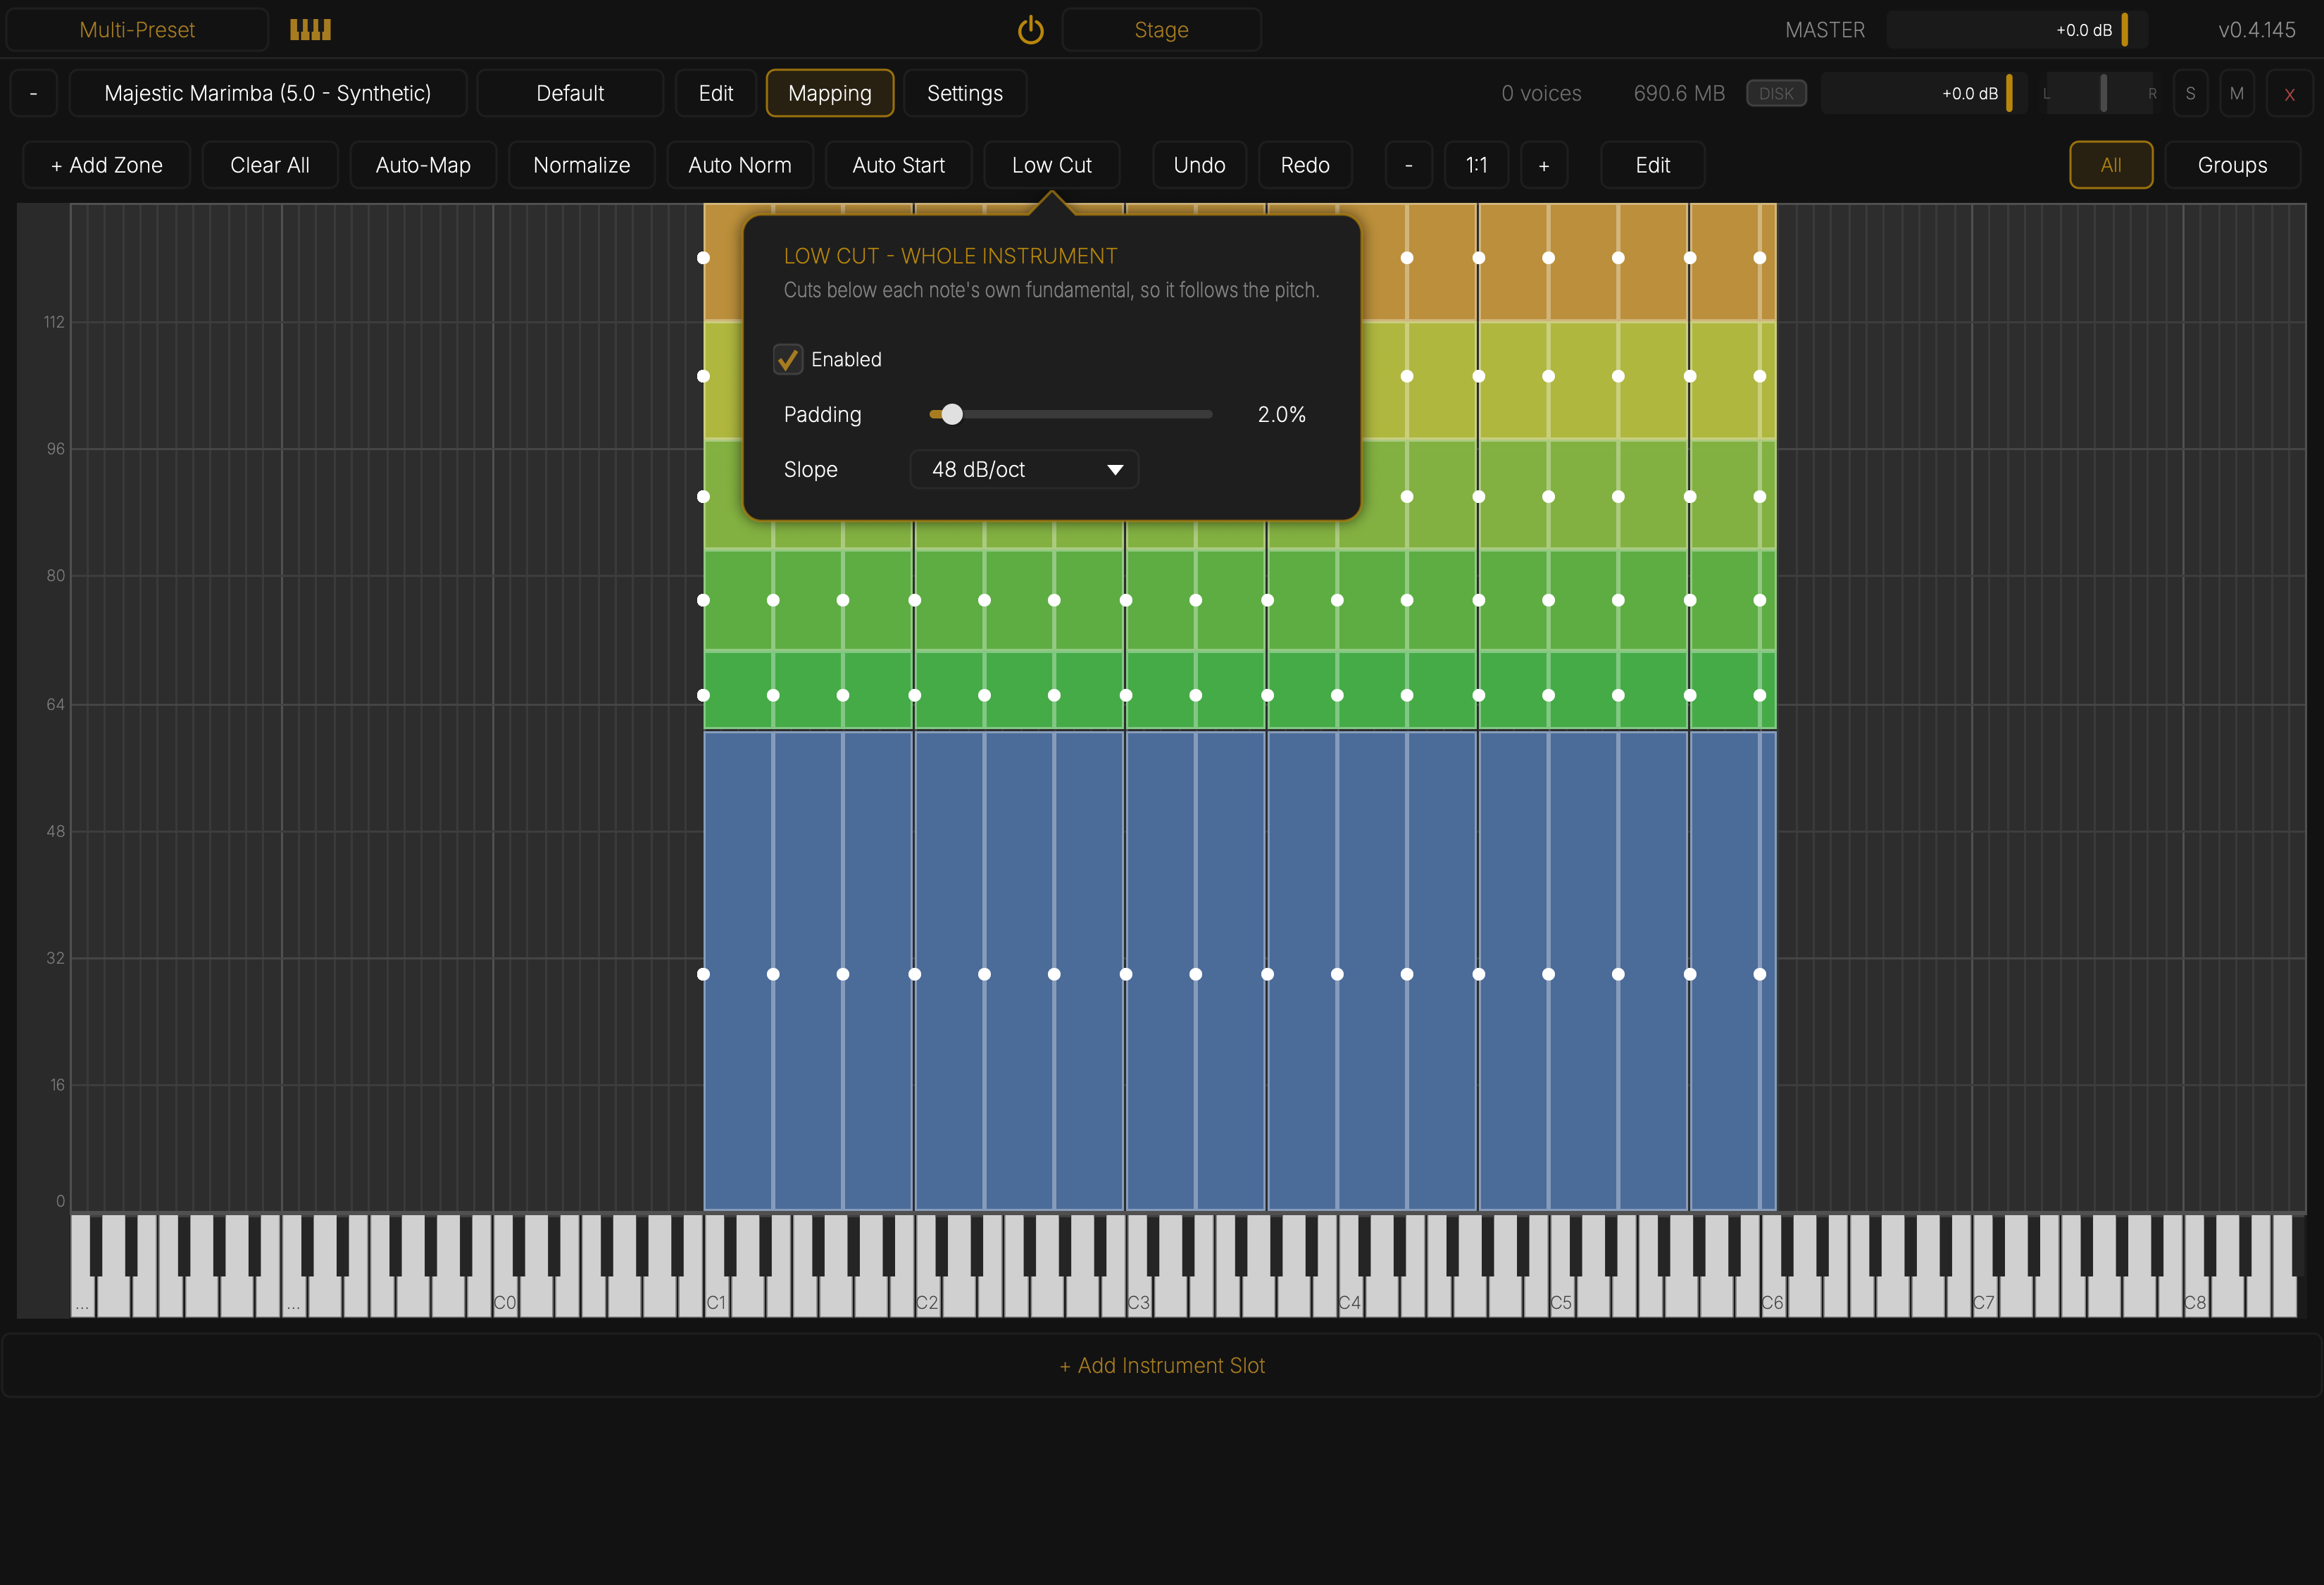
The Mapping Tab
Mapping opens the sample editor — where zones are laid out across the keyboard and velocity range. You'll only need this page if you're building or adjusting instruments; the factory library arrives fully mapped.
The zone grid
Each zone is a rectangle: its horizontal span is the key range, its vertical span the velocity range, and its group decides when it's eligible to play. Click a zone to open it in the zone settings panel; drag to move or resize; multi-select with a marquee.
- Show-all-groups toggle and the group filter narrow the grid to the groups you are working on.
- Zoom controls and the ruler keep large mappings navigable.
- Undo / Redo cover every mapping edit (depth configurable in Settings).
If a played velocity lands in a gap between layers, the engine falls back to the nearest velocity layer within the allowed groups rather than playing silence.
Building an instrument
- + Add Zone or drag samples in — the Auto-Map dialog reads names/pitches and lays zones out for you.
- Auto-Start trims leading silence visually: drag the threshold line on the waveform preview and every selected zone's start marker follows. A Fix Outliers pass catches strays.
- Normalize / Auto-Normalize level the zones (the analysis window is configurable in Settings).
- The waveform editor fine-tunes a single zone's start point against the audio.
Saving
Save Instrument As… writes the instrument to your library folder: the .inst
definition, the .spc sample container (samples are Opus-compressed — a full
instrument is hundreds of MB, not gigabytes), the .presets file, and the instrument
image. Saved instruments appear in every slot's instrument dropdown and can join the
Sibelius auto-load map like any factory instrument.